30 Mayıs 2012 Çarşamba

Peanut Butter Oreo Cups

To contact us Click HERE
 recently came across this picture on Pinterest. You are looking at a full size Reese's Cup sandwiched between a double stuffed Oreo then dipped into chocolate.

I made mine using milk chocolate melted with peanut butter. The peanut butter helps the chocolate set more quickly since I didn't plan on tempering my chocolate for these.

First you sandwich the full size Reese's Cup between a double stuffed Oreo, then cover in chocolate.

Set aside on a sheet of wax paper and allow to dry. I let mine set out for 15 minutes then popped them into the fridge so they would firm up the rest of the way faster.

This is what they will look like but the inside is much prettier...

They are a mouthful so I encourage you to slice them open. I like doing this because I love seeing the gorgeous layers of pure sweetness.


I had some leftover chocolate so I tossed some flavored espresso beans and white chocolate chips in to make some bark.

Pure deliciousness.
~MySweetCreations

Peanut Butter Treasure Cookie Dough

To contact us Click HERE
I wanted to whip up a quick and easy treat while my sister was visiting from another state one evening. I decided to throw together this eggless and baking soda and powderless recipe. You can use this as a dip and serve with graham crackers or you can eat it straight with spoons like we did.  :)
I now present to you my Peanut Butter Treasure Cookie Dough!
Peanut Butter Treasure Cookie Dough
Ingredients:
1/2 Cup Butter, Softened
1/3 Cup White Granulated Sugar
1 Teaspoon Pure Vanilla Extract
1 Pinch of Salt
1 Cup Flour
1/4 Cup Creamy Peanut Butter
1/3 Cup Heavy Cream
1/2 Cup Milk Chocolate Chips
3 Tablespoons Oats
1/3 Cup Peanut Butter M&M's
Sprinkle Ground Cinnamon
Directions:
1.) In a mixing bowl cream butter and sugar. Stir in vanilla and salt.
2.) Sift flour and mix. Once flour is incorporated, stir in peanut butter.
3.) Slowly begin mixing in heavy cream.
4.) Add in the goodies! Stir in milk chocolate chips, oats, M&M's.
5.) Add a sprinkle of ground cinnamon on top and serve or covered tightly and store in the refrigerator until ready to serve.
~MySweetCreations


Adventuring Randoms

To contact us Click HERE

Here are some photos from the past two weeks! I have more to share in upcoming posts as I don't want to bombard you all at once.
We met Sully at Disneyland and he was by far the coolest character yet. We went on a Thursday and I never seen so many characters at one time at Disneyland and California Adventure...they were everywhere!

My sister came to visit for 10 days so we had to take her to Disneyland. I went on the Hollywood Tower of Terror with her. It was only my second time and quite terrifying, although not as bad as the first time. The anticipation of the drop eats at me while we wait in line and as we board the ride.

Just my cat looking cute on the couch.

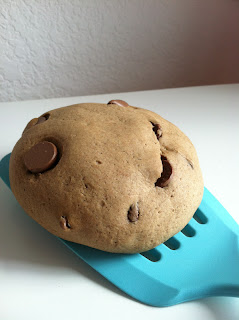
I made my Cinnamon Espresso Chocolate Chip Cookies this week while my sister was here. I like to make the cookies large by using about 1/2 cup of dough rolled into a ball. I get eight very large cookies out of the batch by doing this.

Yogurtland love. This place is the best! Mine is the lower one...I like to get several flavors and cover them in chocolate sauce.

My sister works at Starbucks and she taught me how to make my cold chai into a dirty chai. It is so easy but I had no idea that a dirty chai is a chai with a shot of espresso!

Yes....more fro-yo. This time we went to a local place to try out their frozen yogurt flavors.

My fabulous Home Goods haul that brought me much excitement. I fell in love with the pillow until I got home and discovered the front from coming apart in three different places and with use and time it would totally come apart so I had to return it. Unfortunately it was the only one they had.

My sister hasn't had the pleasure of walking through an IKEA yet, so we went. We both love this really long white desk and it also has hidden rollers underneath and can roll over your bed creating a workspace. It was perfect for her as a college student getting ready to move out for the first time this summer.

She loved this purple bedding.

This is my IKEA haul.....nothing too exciting. They had sets of the jars $3.99 for 4. I ended up putting rubber bands, paper clips, etc. in them, but they are intended for kitchen use. You can get really creative with them. I also purchase a 2 pack of magazine holders for $4.99. I put my cookbooks in them and tucked them into the pantry for a clean look.

Excuse the terrible dressing room lighting. I branched out while my sister was here and bought these black flowy short with scalloped details at the hem. They were already marked down and got to take an additional 30% off so they were $13.

Me and my girls at home....

Peanut Butter Treasure Cookie Dough (recipe can be found in the previous post) that my sister and I devoured late at night while we played juvenile board games. Games are the best.

Me along the Pacific Ocean.

I also branched out and bought this maxi skirt at Old Navy with my sister. I have already worn it three times and I am loving it!

Tried something new at a local place called Chi Chocolat. These actually scoop melted chocolate out of their tempering machines to make lattes and mochas. I tried the spicy mocha and it ended up having both chili and black pepper in it and was a tad on the hot side. 

Checking out Cost Plus World Market I spied some aqua blue kitchen treasures. I ended up passing because I wanted to buy several of these containers but they were $4.99 each and that adds up quickly. Instead I bought these!

My sister loved this couch, it was so cute and full of character!

Each button was covered in a different fabric.

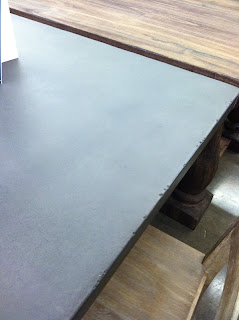
I also found a table I liked at World Market. The top was grayish black and reminded me of a chalk board. I couldn't tell if it was metal or some other material.

That's all for now! I will be sharing more photos soon!

23 Mayıs 2012 Çarşamba

Packaging Baked Goods in Your Kitchen - Creative & Resourceful Ideas

To contact us Click HERE


When I owned a catering company, I learned that it, indeed, is “all about presentation,” as they say.  I’ll never understand how someone can spend so much time and effort into making a delicious and beautiful treat, then put it into a plastic tupperware box or put it on a paper plate wrapped in plastic wrap.  Drives me crazy... I realize that most people do not have all the time in the world to dream up how to package their cookies.  Yes, I know there are more important things.  Buuuut, it is so easy with just a little effort.

Take a cue from you favorite retail boutiques, do they put your purchases in a plastic grocery stack?  No, they wrap your items lovingly in tissue sealed with a branded sticker and then into a color coordinated gift bag.  Packaging your kitchen goodies nicely might even make them taste better... if that is possible.

 Kitchen Packaging Supplies
   
    Cellophane Bags
    Large 4” circle labels
    Small Rectangle Labels
    Parchment paper
    Bakers twine
    Scissors
    Various Ribbons & Colorful Twine

Here are some of the examples of how I have used these materials throughout the year :


 The BEST Buttermilk Biscuits & Homemade Blackberry Preserves

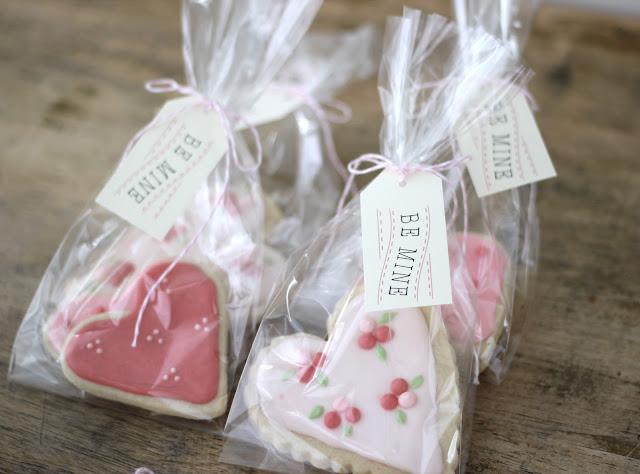
Valentine's Day Sugar Cookies in bags with twine tie

Valentine's Day Sugar Cookies with Foldover Card 

Banana Bread packaged in parchment tied with twine

oohh... look what's inside!  (recipe here)

Black and White Cookies with Large Circle Labels, Ribbon & Cello Bags

Black and White Cookies with Large Circle Labels, Ribbon & Cello Bags 

Mini Chocolate and Salted Caramel Sandwich Cookies in Cello Bags with Foldover Card 

Mini Chocolate and Salted Caramel Sandwich Cookies in Cello Bags with Foldover Card packaged in a mailer box with parchment paper, then tied with natural twine.


Holiday Sugar Cookies in cello bag, tied with twine and card

Chocolate Brownie Cupcake... yum!

Tomato, Zucchini and Olive Bruschetta | Fresh Summer Party Food

To contact us Click HERE

I love good party food.  I really do think there is an art to designing a menu for a party.   It should be fresh, really flavorful, not too complicated and look bountiful - no one likes to go to a party where they feel like the food is rationed out or they have to wonder what it is they're eating!   When I was catering, I was able to observe what people when crazy for, then I would think about why...  
Here are my rules for great party food :
- Goes great with a cocktail, beer or glass of wine- Easy to eat with one hand- Easy to eat in a couple of bits- Good hot, cold and/or at room temperature
These bruschetta fit the bill- in fact, most all bruschetta fit the bill.  I really like this combination of tomatoes, zucchini and olives - it feels very summery to me.  Another reason this is great party food?  Budget friendly.  The zucchini is a budget friendly way to stretch the more expensive tomatoes and olives.  Zucchini typically takes on the flavors you add to it, so the garlic and seasoning will make it taste very flavorful, not to mention the great green color it adds.  Don't feel like you have to splurge on heirloom tomatoes for this recipe- the seasoning and the other ingredients provide plenty of color.  Save your splurge for something else.  


Tomato, Zucchini & Olive Bruschetta
perfectly fresh party food for summer

serves 8 people for appetizers

1 zucchini, diced
2 tablespoons of olive oil
1 small pinch of red pepper flakes
1 clove of garlic, minced
1 teaspoon of sea salt
1/2 teaspoon of cracked pepper
..........
3 cups of diced tomatoes
1/2 cup of kalamata olives
2 tablespoons of olive oil
1 teaspoon of sea salt
1/2 teaspoon of cracked pepper
..........
1 large baguette, sliced into 24 slices
2 tablespoons of olive oil
1 clove of garlic 

Heat oven to 425 degrees.  Place diced zucchini on a baking sheet and toss it in 2 tablespoons of olive oil, 1 small pinch of red pepper flakes, minced garlic clove, 1 teaspoon of sea salt and cracked pepper.  Roast it in the oven for 10 minutes until the zucchini begins to brown on the tips.  Remove from the oven and let cool.

Meanwhile, dice tomatoes and olives and place them in a medium bowl.  Dress the tomatoes and olives with  olive oil, salt & pepper.  Add the zucchini and toss.  Refrigerate until you're ready to use- I like to serve this cold, but it is great at room temperature, too.

Prepare the bread by slicing it into thin slices.  Toast bread just before serving.  You can do it under the broiler in your oven, or on the grill.  Brush the bread with olive oil on both sides.  If broiling, place them on a sheet and place them under the broiler for 1-2 minutes on each side.  Be careful not to burn!  If grilling, also grill the bread on each side for 1-2 minutes.  When you remove them from the grill or oven, let them cool slightly, then rub the raw clove of garlic on each piece.

Serve with the tomato mix and parmesan cheese on the side to be assemble by the guests, so the bread does not get soggy.  If you would like to serve them pre-assembled, I recommend assembling, then serving them immediately from a passed tray.


Piled high.  Don't you like the napkin?  I made it myself!
 
I gobbled up these three right after shooting... I would plan for 3 per person.  At least.


I think these work great for pre-dinner appetizers because they are not too heavy- light and fresh before dinner so your guests are still hungry!  Paired with some other hors d'oeuvres they are great for a cocktail party, too, as they are substantial enough to be satisfying... think of them as a side dish as party of a mini meal. 


I'm so ready for some Summer parties... and Summer cocktails.  What are your favorites to serve to a crowd?